Capacitor, a cross-platform native runtime by the Ionic team, allows you to create hybrid iOS, Android, and web applications with a single codebase.
One of the powerful features of Capacitor is the ability to extend its functionality through plugins. Whether you need to access native device features or add custom functionality, creating a Capacitor plugin is a straightforward process. In this guide, we’ll walk you through the steps to create a Capacitor plugin from scratch.
Prerequisites
Before we start, ensure you have the following installed:
- A basic understanding of JavaScript/TypeScript
- Node.js (>= 12.x) and npm (Node Package Manager)
- Capacitor CLI (
npm install -g @capacitor/cli) - Android Studio for Android development
- XCode and the command line tools(
xcode-select --install) for iOS development
Step-by-Step Guide
1. Initialize Your Plugin
Use the Capacitor CLI to initialize a new plugin:
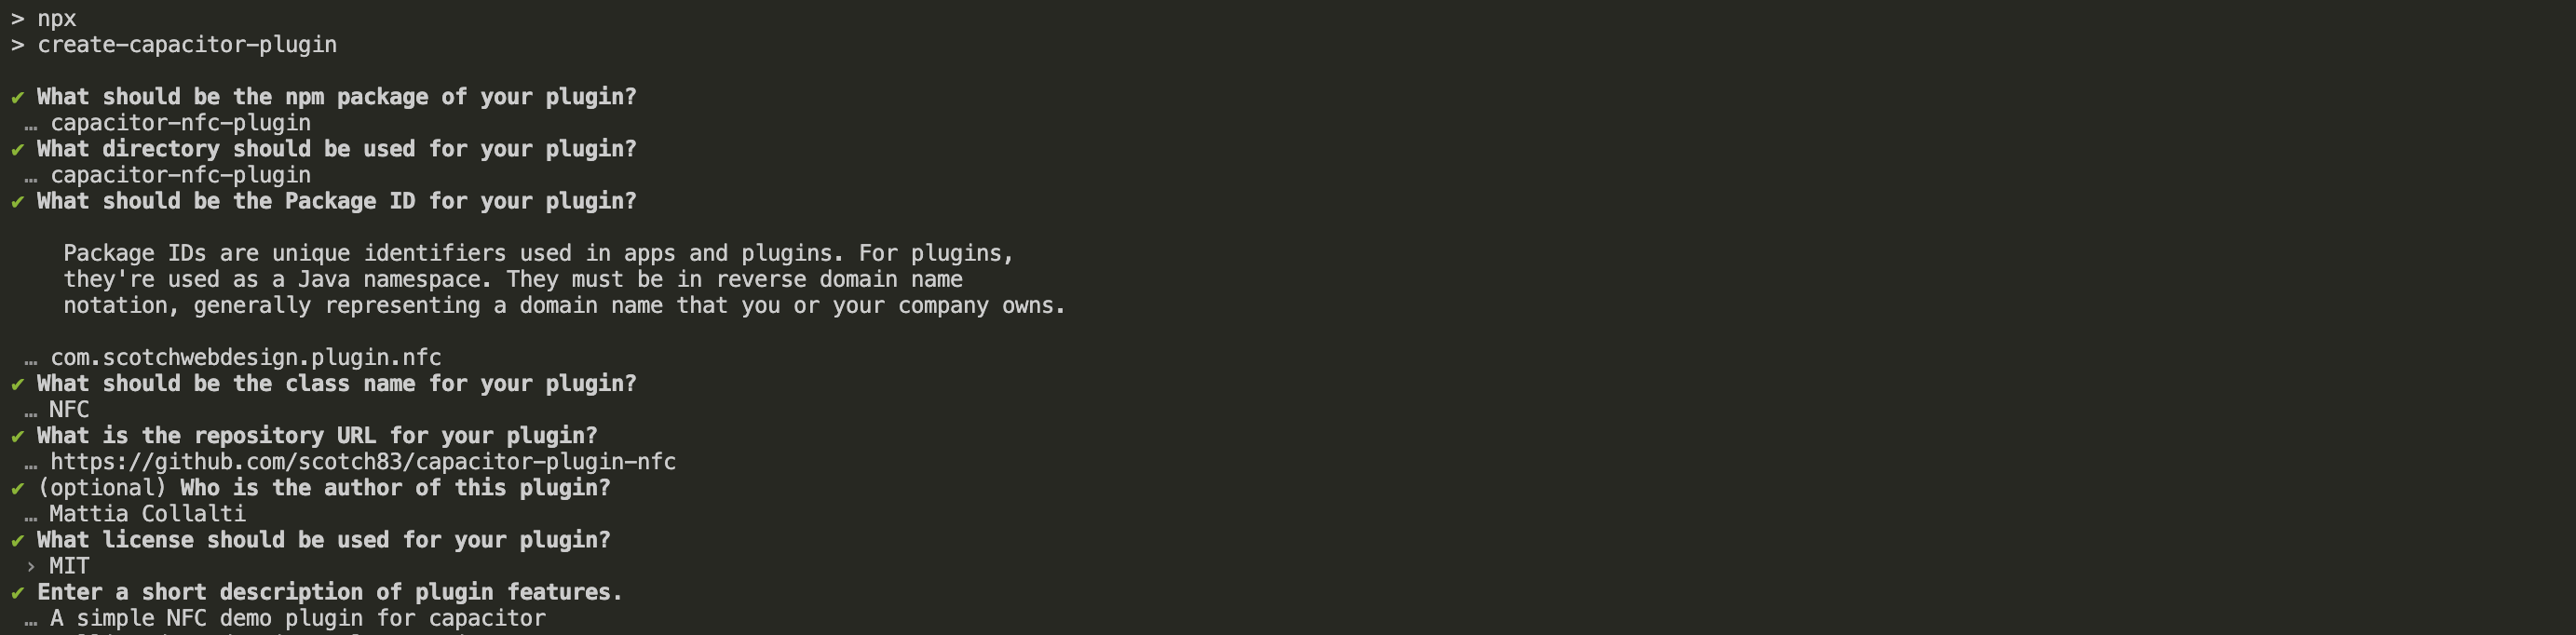
npm init @capacitor/plugin@latest
This will prompt you to enter information about your plugin such as the name and its repository, and generate the necessary files and folder structure for your plugin at the end. I did something like this, will help do something similar as you can then follow the tutorial better.
You can now open your favorite IDE at the project root and start coding!
2. Define Method Signature
In src/definitions.ts, define the method signature for NFC functionality:
export interface NFCPlugin {
  startReading(): Promise<{ isReading: boolean }>;
  stopReading(): Promise<{ isReading: boolean }>;
}
3. Web Implementation
Implement the method in src/web.ts:
import { WebPlugin } from '@capacitor/core';
import { NFCPlugin } from './definitions';

export class NFCWeb extends WebPlugin implements NFCPlugin {

  startReading(): Promise<{ isReading: boolean }> {
    console.warn('This feature is not available in the browser.');
    return Promise.resolve({ isReading: true });
  }

  stopReading(): Promise<{ isReading: boolean }> {
    console.warn('This feature is not available in the browser.');
    return Promise.resolve({ isReading: false });
  }

}
4. Android implementation
Implement the code for the NFCPlugin.java file:
package com.scotchwebdesign.plugin.nfc;

import android.content.Intent;
import android.nfc.NfcAdapter;
import android.nfc.Tag;
import android.nfc.tech.Ndef;
import android.util.Log;

import com.getcapacitor.JSObject;
import com.getcapacitor.Plugin;
import com.getcapacitor.PluginCall;
import com.getcapacitor.PluginMethod;
import com.getcapacitor.annotation.CapacitorPlugin;

@CapacitorPlugin(name = "NFC")
public class NFCPlugin extends Plugin {

    private boolean isReading = false;

    @PluginMethod
    public void startReading(PluginCall call) {
        isReading = true;
        Log.i("NFC", "NFC Started");
        resolve(call, isReading);
    }

    @PluginMethod
    public void stopReading(PluginCall call) {
        isReading = false;
        Log.i("NFC", "NFC Stopped");
        resolve(call, isReading);
    }

    protected void resolve(PluginCall call, boolean isReading) {
        JSObject ret = new JSObject();
        ret.put("isReading", isReading);
        call.resolve(ret);
    }

    @Override()
    protected void handleOnNewIntent(Intent intent) {
        super.handleOnNewIntent(intent);
        if (isReading && NfcAdapter.ACTION_NDEF_DISCOVERED.equals(intent.getAction())) {
            Tag tag = intent.getParcelableExtra(NfcAdapter.EXTRA_TAG);
            if (tag != null) {
                // Handle the NFC tag
                Ndef ndef = Ndef.get(tag);
                JSObject ret = new JSObject();
                ret.put("tagData", ndef.toString());
                notifyListeners("nfcTagRead", ret);
            }
        }
    }
}
5. iOS implementation
Implement the code for the NFCPLugin.swift file:
import Capacitor
import CoreNFC

/**
 * Please read the Capacitor iOS Plugin Development Guide
 * here: https://capacitorjs.com/docs/plugins/ios
 */
@objc(NFCPlugin)
public class NFCPlugin: CAPPlugin, CAPBridgedPlugin, NFCNDEFReaderSessionDelegate {
    public let identifier = "NFCPlugin"
    public let jsName = "NFC"
    public let pluginMethods: [CAPPluginMethod] = [
        CAPPluginMethod(name: "startReading", returnType: CAPPluginReturnPromise<bool>),
        CAPPluginMethod(name: "stopReading", returnType: CAPPluginReturnPromise<bool>),
    ]
    private var nfcSession: NFCNDEFReaderSession?
    private var call: CAPPluginCall?

    @objc func startReading(_ call: CAPPluginCall) {
        self.call = call
        nfcSession = NFCNDEFReaderSession(delegate: self, queue: nil, invalidateAfterFirstRead: false)
        nfcSession?.begin()
        call.resolve([
            "isReading": true
        ])
    }

    @objc func stopReading(_ call: CAPPluginCall) {
        nfcSession?.invalidate()
        call.resolve([
            "isReading": false
        ])
    }

    public func readerSession(_ session: NFCNDEFReaderSession, didDetectNDEFs messages: [NFCNDEFMessage]) {
        var resultArray = [[String: Any]]()
        for message in messages {
            for record in message.records {
                var recordDict = [String: Any]()
                recordDict["type"] = String(data: record.type, encoding: .utf8)
                recordDict["identifier"] = String(data: record.identifier, encoding: .utf8)
                recordDict["payload"] = String(data: record.payload, encoding: .utf8)
                resultArray.append(recordDict)
            }
        }

        let ret = ["messages": resultArray]
        notifyListeners("nfcTagRead", data: ret as JSObject)
    }

    public func readerSession(_ session: NFCNDEFReaderSession, didInvalidateWithError error: Error) {
        // Handle the error if needed
    }
}
6. Test with the example app
When we created the plugin, the npm init script has also created a inner example folder in which we have a project to test our plugin.
Open this project and install our plugin:
Install the plugin
This will install the plugin based on the package.json file in the parent folder.
# from the root project of your plugin
cd example && npm install ..
Write the example app code to test your plugin
-
Open the
index.htmlfile and add two buttons to start and stop NFC listening<button onclick="startListening()">Start...</button> <button onclick="stopListening()">Stop!</button> <div id="results"></div>We add a div
#resultsin which we are going to show the results returned by the reading. -
Add the code to the
example.jsfile for the click handlersimport { NFC } from 'capacitor-nfc-plugin'; let start = false; window.startListening = async () => { await NFC.startReading(); console.log('start Reading'); if (start) return; NFC.addListener('nfcTagRead', info => { console.log(info); document.querySelector('#results').innerHTML += `<br>${info}</br>`; }); start = true; }; window.stopListening = async () => { await NFC.startReading(); console.log('stopped Reading'); };
Compile the example app and sync
This will package your html, css and javascript into the dist folder and sync it with your android and ios projects
npm run build
npx cap sync
Run the Android project
-
Open the Android project in Android Studio
npx cap open android -
Set the Android Manifest permissions
Before running the project, ensure your Android app has the right permissions declared in the
AndroidManifest.xmlfile:<uses-permission android:name="android.permission.NFC" /> <uses-feature android:name="android.hardware.nfc" android:required="true" />
You can now start the project in your Android Studio environment and test it.
Run the iOS project
-
Open the iOS project in XCode
npx cap open ios -
Set the iOS privacy permission descriptions
Before running the project, ensure the
Info.plistof the iOSexampleapp project has the following:<key>NFCReaderUsageDescription</key> <string>App needs access to NFC to read tags</string>
You can now start the project in XCode using and test it works
Conclusions
Creating an NFC Capacitor plugin allows you to leverage the powerful capabilities of NFC technology in your Ionic applications. By following this guide, you can create, implement, and publish your own NFC Capacitor plugins for both iOS and Android. Happy coding!